Editing and Refreshing Mature Native Gardens

As native gardens mature, they’re supposed to change; but that evolution can easily tip into “crowded thicket” instead of layered, beautiful habitat. This guide shows you how to read an established planting, identify what’s too much or too little, and edit by moving, dividing, and re‑planting so the garden feels refreshed without starting from scratch.
Step 1 – Read the garden before you touch anything
Wait until things have really kicked off with current year growth and then walk the garden to take quick notes:
- Which plants are thriving and showing up in multiple places?
- Which plants are struggling, hidden, or barely present?
- Where does the garden feel too crowded, and where does it feel thin or bare?
- How does it look from key viewpoints (street, driveway, main windows)?
Think in terms of “too much, too little, just right” rather than good vs. bad. This gives you a simple map for what to change.
Step 2 – Identify “too much” and “too little”
“Too much” plants
These are species that:
- Have spread well beyond their original spots.
- Crowd or overshadow neighbors.
- Dominate the view from key angles.
Options:
- Thin or divide them and re‑use divisions elsewhere.
- Move some to a “wilder” area with more room.
- In extreme cases, remove or replace with less assertive species.
“Too little” plants
These are species that:
- You love but only see one or two of.
- Are hidden behind taller neighbors.
- Would make good anchors or repetition if they were more prominent.
Options:
- Divide and re‑group them into visible clumps.
- Move them to better positions (front or mid‑bed, near paths or focal points).
- Consider buying a few more to strengthen their presence.
Step 3 – Restore structure: edges, layers, and anchors
In many mature gardens, structure has softened. To refresh it:
- Re‑define edges: sharpen bed lines and ensure low, tidy plants occupy the front edge so the garden reads as intentional.
- Re‑build layers: move tall species toward the back or center and low species to the front, so you re‑establish a stepped profile.
- Reinforce anchors: emphasize a handful of shrubs, grasses, or upright perennials that act as visual “posts” through the planting.
You can often do this just by moving and dividing existing plants, not buying new ones.
Step 4 – Thin, divide, and move at the right times
Editing is easiest and least stressful for plants when you time it well:
- Cool‑season edits (spring or early fall) are best for most perennials and grasses.
- Dig and divide vigorous clumps that are crowding neighbors or blooming less than they used to.
- Replant divisions promptly at the same depth, water them in well, and mulch lightly until they re‑establish.
Work in sections so you’re not uprooting the entire garden at once. That way, wildlife still has cover and you can better see how each area is changing. Note: Be sure to look up which plants set deep tap roots as these are often difficult if not impossible to transplant successfully once well established.
Step 5 – Fill strategic gaps
Gaps show up as:
- Bare patches of soil or mulch.
- Seasonal holes where little is happening in early spring, midsummer, or fall.
- Visual dead zones from key viewpoints.
To refresh:
- Add groundcovers or low spreaders in bare spots to suppress future weeds.
- Plug in a few well‑chosen natives that bloom or fruit in your weak months.
- Use new plants to repeat existing colors or forms, tying old and new together.
A small number of purposeful additions can dramatically improve how “finished” the garden feels.
Step 6 – Respect self‑sowing, but set boundaries
Self‑sowing is one of the joys of native gardens, but it needs gentle management:
- Allow seedlings of desired species to fill in where they improve density or seasonal interest.
- Thin seedlings where they create congestion or obscure more important structural plants.
- Remove volunteers of species you’ve decided you don’t want more of.
Think of yourself as a curator: you’re not stopping natural movement, you’re guiding it.
Step 7 – Keep editing a regular, low‑stress habit
Refreshing a mature garden works best as an ongoing process, not a once‑in‑a‑decade overhaul.
Simple annual rhythm:
- Early spring: move and divide, re‑layer heights, reinforce edges.
- Summer: light trimming along paths, spot‑weeding, observe what’s thriving.
- Fall: remove true problem plants, add a few new anchors or gap‑fillers, plan next spring’s edits.
This keeps the garden evolving in a direction you like without big, disruptive projects.
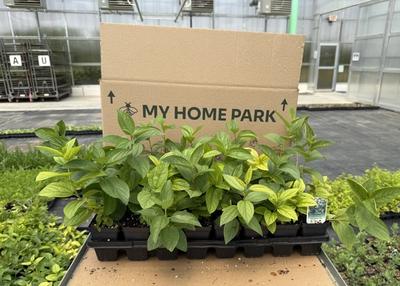
How My Home Park helps you refresh instead of restart
Editing is much easier when your starting design has clear structure and compatible plant communities.
My Home Park’s native garden kits:
- Give you a clear baseline layout (groupings, layers, edges) you can return to as you edit.
- Use plant combinations that are meant to coexist, making it easier to see which species are truly out of bounds.
- Make adding new beds or expanding existing ones straightforward, so refreshed areas tie in naturally with what’s already working.
We also have many individual native species on offer to help fill gaps, patch up beds, and generally expand the beauty and impact of your yard.
With a bit of annual editing and a solid original plan, your mature native garden can keep getting better - more balanced, more beautiful, and more wildlife‑friendly - without ever needing a full do‑over.
To read further on what to expect and how to edit and update your well-established native plants, check out What to Expect in Year 1, 2, and 3 of a Native Garden and Editing and Thinning Over Time.
Share this article